Wednesday, April 25, 2012

King Derwin


I'm so grateful when small things come together.  When a good idea comes and it does not involve a trip to the Walmarts for supplies. 

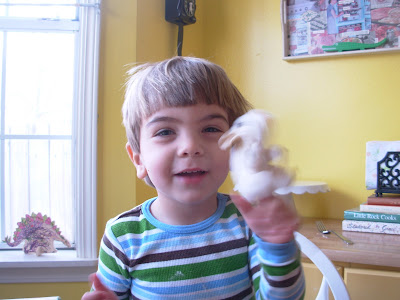
Little Pickelo is to dress up as his favorite storybook character tomorrow for school.  Totally NOT a big deal (they're only 4).  But these things mean a lot to me and I try to make them into fun, interactive experiences.  And helloooo, I am a librarian! So this is serious!  It was decided last week that Calvin would be King Derwin, of the Kingdom of Didd {The 500 Hats of Bartholomew Cubbins by Dr. Seuss}.

I tossed a few ideas around that would be low maintenance, but nothing stuck, and we don't have dress up clothes for a King anywhere.  Then today, while unpacking a box at work, I came upon some stiff but flexible white cardboard.  Took that home.  On the way home I thought about my fabrics and the idea came to simple cut a neck hole in a piece folded over and make a King's Robe, of sorts.


It took 5 minutes to make and I'm quite pleased with my little King Derwin.  A great deal of fun was had decorating the crown.  We talked about patterns and how good hot glue smells, and we decked it out! A crafter after my own heart.


Tuesday, April 17, 2012

Every Mouse needs a blanket


3rd birthday, 2011

Mousie is an important member of our family.  I did not know when I gave Mousie as a present on a 3rd birthday that he would become a treasured friend.  Mousie's attributes are many.  He's clever and sneaky.  He loves to tell secrets.  He is fairly well behaved as mouses go, and he likes to come along for all adventures.  Seems like he follows in the footsteps of many great literary mice - Ralph S. Mouse, Stuart Little, Santa Mouse, the Downstairs Cranston's {Secrets at Sea, Richard Peck}.

A request came up for Mousie to have his own blanket.  We talked about it what it should look like & Calvin decided upon stripes, rainbow stripes.  I took him into my fabric stash and he picked out each color and picked the flannel backing. 


After agreeing that I'd make it, Calvin checked on my progress for many days - asking when it would be finished.  "You're a Maker!" Calvin declared.  Stop my heart, baby; what a precious compliment. 

All moms are makers.


Thursday, April 5, 2012

Easter 2008

Before you have kids, you have no idea that one photo can drop you into tears.  Case in point:


It is just when you are looking back, you cannot believe how fast it goes.  And when you are looking forward, you can't wait for the current moment (circumstance, crying child, job, car problem) to change, go away, get better.

The other night I got stuck looking at pictures (started out just trying to locate one for a project). And 2 hours later, I was still there - well after my bedtime - in tears, watching this sweet precious boy grow before my eyes.  This is a very good way to decide to have another child - start reminiscing about the 1st one (2nd one, 3rd one) and promise yourself to hold on just a bit tighter to any future children.

I think this is something moms just know, after becoming moms and making it a year or two.  You give other moms an understanding nod when they mention how fast their little ones are growing. You reflect on your own kids and you promise yourself to hold on a bit tighter, see more closely, love more fully. All you can really do is slow things down and work at being more present.

Monday, April 2, 2012

Burlap Door Hanger, part duex

My burlap door hanger skills have evolved!  {see the original Valentine door hanger here.} As it turns out, spray paint is not the best mechanism for painting your burlap.  Plain ol' acrylic paint is far better and gets you a sturdier, thicker, better end result.


  • Cut whatever shape you want out of burlap.
  • Paint the burlap with whatever details needed. Do you want to paint the back a solid color?  Totally up to you. Since my front door is glass, I typically do one or two quick coats on the back of my design.  If I had a wood door with no glass, I wouldn't be going to such trouble.
  • Cut some wire and arch it so that you have that ready for the "hanger" part.
  • After all paint is dry, stuff your design with plastic grocery bags and glue your design shut as you stuff.  I recommend doing this outside since hot glue can get everywhere and burlap dust can also get everywhere. Don't overstuff - it doesn't need to be too bulgy.
  • Go slowly around your whole object and make sure you are glueing each seam nicely.
  • At the top of your object, put some extra glue on there for the wire and then glue shut. 
Be careful of ears.  Like those bunny ears you see there?  Well, they ended up being a bit too top heavy for my sweet bunny.  This maybe could have been fixed with internal wires, but I think they are too tall to stand up on their own.  You can't see this, but I strung some fishing line through the tops of those ears and it is taped, ever so discreetly, to the top of my door frame. 


Next up on the burlap door hanger list?  A cupcake, for sure, for birthdays.  But other things, I cannot even say!  It is going to be so adorable you might fall out of your chair.
Related Posts Plugin for WordPress, Blogger...