Wednesday, April 25, 2012

King Derwin


I'm so grateful when small things come together.  When a good idea comes and it does not involve a trip to the Walmarts for supplies. 

Little Pickelo is to dress up as his favorite storybook character tomorrow for school.  Totally NOT a big deal (they're only 4).  But these things mean a lot to me and I try to make them into fun, interactive experiences.  And helloooo, I am a librarian! So this is serious!  It was decided last week that Calvin would be King Derwin, of the Kingdom of Didd {The 500 Hats of Bartholomew Cubbins by Dr. Seuss}.

I tossed a few ideas around that would be low maintenance, but nothing stuck, and we don't have dress up clothes for a King anywhere.  Then today, while unpacking a box at work, I came upon some stiff but flexible white cardboard.  Took that home.  On the way home I thought about my fabrics and the idea came to simple cut a neck hole in a piece folded over and make a King's Robe, of sorts.


It took 5 minutes to make and I'm quite pleased with my little King Derwin.  A great deal of fun was had decorating the crown.  We talked about patterns and how good hot glue smells, and we decked it out! A crafter after my own heart.


Tuesday, April 17, 2012

Every Mouse needs a blanket


3rd birthday, 2011

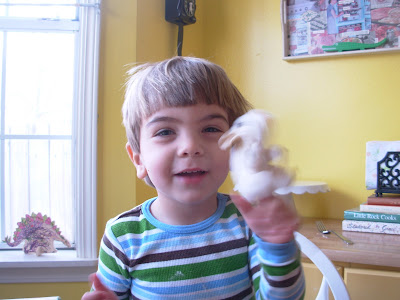
Mousie is an important member of our family.  I did not know when I gave Mousie as a present on a 3rd birthday that he would become a treasured friend.  Mousie's attributes are many.  He's clever and sneaky.  He loves to tell secrets.  He is fairly well behaved as mouses go, and he likes to come along for all adventures.  Seems like he follows in the footsteps of many great literary mice - Ralph S. Mouse, Stuart Little, Santa Mouse, the Downstairs Cranston's {Secrets at Sea, Richard Peck}.

A request came up for Mousie to have his own blanket.  We talked about it what it should look like & Calvin decided upon stripes, rainbow stripes.  I took him into my fabric stash and he picked out each color and picked the flannel backing. 


After agreeing that I'd make it, Calvin checked on my progress for many days - asking when it would be finished.  "You're a Maker!" Calvin declared.  Stop my heart, baby; what a precious compliment. 

All moms are makers.


Thursday, April 5, 2012

Easter 2008

Before you have kids, you have no idea that one photo can drop you into tears.  Case in point:


It is just when you are looking back, you cannot believe how fast it goes.  And when you are looking forward, you can't wait for the current moment (circumstance, crying child, job, car problem) to change, go away, get better.

The other night I got stuck looking at pictures (started out just trying to locate one for a project). And 2 hours later, I was still there - well after my bedtime - in tears, watching this sweet precious boy grow before my eyes.  This is a very good way to decide to have another child - start reminiscing about the 1st one (2nd one, 3rd one) and promise yourself to hold on just a bit tighter to any future children.

I think this is something moms just know, after becoming moms and making it a year or two.  You give other moms an understanding nod when they mention how fast their little ones are growing. You reflect on your own kids and you promise yourself to hold on a bit tighter, see more closely, love more fully. All you can really do is slow things down and work at being more present.

Monday, April 2, 2012

Burlap Door Hanger, part duex

My burlap door hanger skills have evolved!  {see the original Valentine door hanger here.} As it turns out, spray paint is not the best mechanism for painting your burlap.  Plain ol' acrylic paint is far better and gets you a sturdier, thicker, better end result.


  • Cut whatever shape you want out of burlap.
  • Paint the burlap with whatever details needed. Do you want to paint the back a solid color?  Totally up to you. Since my front door is glass, I typically do one or two quick coats on the back of my design.  If I had a wood door with no glass, I wouldn't be going to such trouble.
  • Cut some wire and arch it so that you have that ready for the "hanger" part.
  • After all paint is dry, stuff your design with plastic grocery bags and glue your design shut as you stuff.  I recommend doing this outside since hot glue can get everywhere and burlap dust can also get everywhere. Don't overstuff - it doesn't need to be too bulgy.
  • Go slowly around your whole object and make sure you are glueing each seam nicely.
  • At the top of your object, put some extra glue on there for the wire and then glue shut. 
Be careful of ears.  Like those bunny ears you see there?  Well, they ended up being a bit too top heavy for my sweet bunny.  This maybe could have been fixed with internal wires, but I think they are too tall to stand up on their own.  You can't see this, but I strung some fishing line through the tops of those ears and it is taped, ever so discreetly, to the top of my door frame. 


Next up on the burlap door hanger list?  A cupcake, for sure, for birthdays.  But other things, I cannot even say!  It is going to be so adorable you might fall out of your chair.

Saturday, March 24, 2012

Let's party with the puppies!

For C's 4th birthday, we had a dog party.  It was so much fun to pull together.  I pulled from various online inspirations (Google images, I love you) and then tweaked the ideas to suit our party.


Something we do at Library programs that I find very helpful is "stations."  This may be the most common sense idea ever, and I just don't know it, but it is a very practical way to move a crowd through an event and to make sure people don't have to wait too long on something.  (Not that we had that many kids! but still, it is a helpful idea.)

Our stations:
*Adopt and name your dog (actual dogs the kids got to take home; this was their "favor.")
*Dog ears for the child
*Veterinary station
*Grooming station
*Imaginary play station with 2 dog houses, dog bowls and tennis balls
*Dog collar station
*Bone toss


Two things I learned:
1. Over-inviting is a good idea, particularly if you have two groups of people (school friends vs. personal friends). We had HALF of our guests show up, so, if I'd been conservative with invites, we'd have been in trouble!  You are really the guage of this. . . if your school friends are your best friends, then this might not be the case as much.

2. Birthday parties are expensive. Period. I did not spend money renting a location, but I did spend money on handmade everything and (hard truth though it may be...) all of that adds up.  Then there is the food factor.  Food is a big unknown because you can never fully trust RSVPs vs. not hearing either way.  So you end up possibly over buying just to ensure you have plenty.

This dog party was so fun to plan and host, and I got the biggest compliment of all when my son asked if we could have another dog party the next day saying "that was the best party ever!"  Melt my heart, kiddo. Happy 4th Birthday!

Thursday, March 15, 2012

St. Patrick's Day


Found these on the Crafty Crow and very much love them.  I love anything I can do on the couch while watching Downton Abbey.  I do love a good TV show, but I do not like to sit there without a project.  My sweet other half does not understand this.  He can sit, guilt free, for entire Star Wars marathons (if I let him. And I probably could not do that without giving him the stink eye several times.)

So, happy St. Patrick's Day!


Monday, March 5, 2012

DIY Framed Chalkboard


I recently bought an adorable A-Frame chalkboard at Hobby Lobby for the Library. I had been thinking of making one for the Library, but it ended up being easier to buy the one that was right in front of me than to worry about which method would be easier to execute for a public space (and a very high traffic space.)

So my ideas of making my own chalkboard headed home, and it could not have been easier! This was one of those projects that was blessed with good karma from the get-go. No disasters. No blogs telling me it was easy peasy only to find out that many bloggers might be liars.

I got a good sized frame at Goodwill (all in tact) for $8. I took it apart and discarded the dessert scene print, despite its mauve and sandstone glory.  I sanded the frame a bit and then spray painted it white (one can with paint and primer combined.)  It took quite a few coats...5, probably, to get it looking good.


In the meantime (and this is the best part), the glass itself can be used for the chalkboard. Buy some chalkboard paint at Home Depot ($10ish). I did about 3 coats, but I think it could have taken less. Be sure to use a roller to apply the paint, it will work better.

Reassemble everything and voila - perfectly fun & cheap chalkboard, wall ready! One thing...my kiddo is old enough for this project to not be an in-home disaster.  In other words, he knows chalk stays in the chalk bucket, he is very good at washing his hands after using chalk, and he has not ever drawn on a wall or couch (knocking on wood as I type).  If you have teeny-tinies, you either need to wait until they aren't or keep the chalk in a cabinet and only play during supervised times.

Friday, February 3, 2012

DIY Burlap Door Hanger

I have recently developed an affinity for front door decorating - though I've really never liked wreaths. That's possibly attributable to working at Michael's in college and selling a million of the circular stick variety and seeing soooo many old ladies purchase ones with the broken faux flowers we swept up at night glued on.

When door hangers came out, I thought, "now there is something I'd buy." And then I actually went and priced them and got weak in the knees that they were WELL over my "acceptable" price range. 

So my heart door wreath is made of burlap I already owned, red spray paint I already owned, hot glue, and plastic trash bags from Kroger. Seriously?  WOW!  I cut out a heart, sprayed both sides with a few red coats (sprayed the front side the most), hot glued it except for an opening, stuffed it, and voila!  Now, truth be told, if you get really, really close to it, you can see the difference between mine and one from Hallmark.  Theirs tend to be super saturated in colors, however, I think that is just how many coats of paint you use.  But $50 is still in my pocket and that is all there is to say about that!

Next on the door decorating list: cupcake!
Related Posts Plugin for WordPress, Blogger...